Table of Contents
Introduction
In my Cloud Computing Course at the University of the Cumberlands, ITS-532 there is something different than the other courses I’ve taken so far. There are labs! Unlike most courses which are primarily theory and writing research papers, this one includes hands-on practice in working with different technologies.
In this case, the first Lab involves configuring a Hypervisor which controls some virtual machines. I just finished this lab and I thought I’d include some tips for students who are working on it, so you don’t run into the hiccups I did. Luckily there weren’t too many.
Part 1: Basic Operations Using Hyper-V Manager
Step 21 in part one involves looking at the network configuration of a virtual machine running Ubuntu. The instructions say:

Bute note that the command is actually ip a. This is a typo, Elsewhere in the instructions they make the text red so it looks like execute ip a. This makes it easier to tell that “ip a” is the actual command.
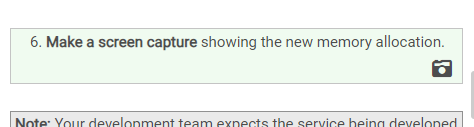
When you need to take a screenshot, you don’t need to use the System > Take Screenshot button. Instead, beside each step where you’re directed to take a screenshot, there’s a clickable button that will take the screenshot and add it to your Lab Report. It’s red until you click it, then it turns green:
Part 2: Basic Operations Using PowerShell
The other part I had challenges with was the pinging back and forth between the virtual machines. I actually had to repeat the command sudo ip addr add 10.10.10.2/24 dev eth1 a couple of times before it “took.”
I also found that if I waited too long between executing this command and pinging the machines, it would forget and I’d have to redo this part. This was the most confusing because I didn’t do anything differently, I just repeated the steps and it worked.
Part 3: Challenge and Analysis
The final part I needed to experiment with was the integration command. You’ll want to make sure that you follow the instructions closely, and pass in the name of the VM using -VMName and -ComputerName. A bunch of time I would get the error that there is no Hyper-V installed because I wasn’t wording my command exactly right.
You’ll need to pass in both -ComputerName (which is the name of the Windows VM, you renamed it in a previous step) and -VMName which is the IP address of the HyperV server.
Conclusion
Finally, in order to save your lab report, you’ll need to click the Disconnect button and exit the lab. That was scary since I didn’t know if I did it right! So I saved my state.

Once you exit the lab, you’ll see this screen:
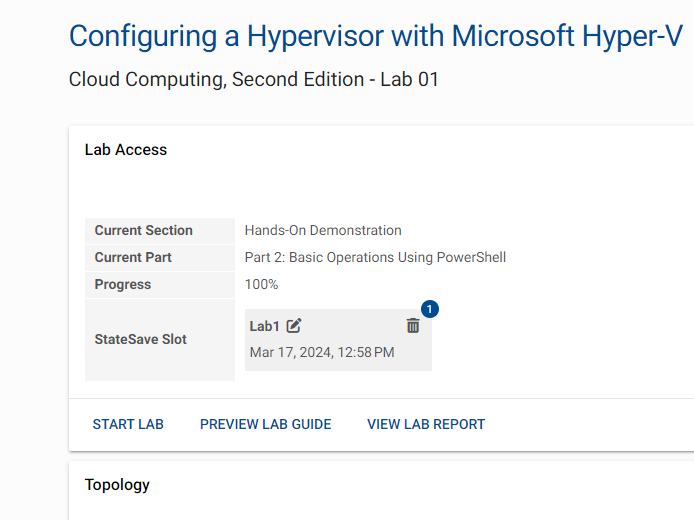
Here, it shows me on Part 2 because I just navigated back there for these screenshots. You can see the “StateSave” that I saved so I could return in case my Lab Report didn’t download. Clicking Start Lab brings you back to the lab, while View Lab Report brings up your PDF. You’ll need to save it and upload it to Blackboard – it’s not automatically shared with your professor.
All in all, I found this an enjoyable lab and a good introduction to this lab software. I’m looking forward to future labs!