Working with the HUD API in Salesforce was a lot of fun, but what a challenge!
Table of Contents
Introduction
I’ve been working in the Salesforce ecosystem for a few years but one thing I have little experience with are integrations. Certainly, I’ve worked on a few with Docusign, Zoom, FormStack, etc., but those are usually done with managed packages. I’ve never done much with APIs.
The US Department of Housing and Urban Development (HUD) provides a free API I’ve long been interested in working with. This API returns information based on FIPS codes, numbers which uniquely identify geographic areas like states, counties, towns, etc.
A while back I tried to get into this API, using a new (at the time) tool called HTTP Callouts that Salesforce came out with. These are an Apex Invocable Action you can use inside your Flow, that allow you to get data from external APIs without coding.
I’ve attempted this once in the past but wasn’t about to figure it out. I returned to it this weekend and finally cracked it! So, here is my guide. This is a clean example but you’ll notice a large number of “do nots” in here, that describe all the ways in which I made the wrong move before I finally figured this out. So, let’s get started!
To set one of these up requires 4 things at minimum:
- Named Credential – this stores the URL for the API, and the Custom Headers
- External Credential – this stores the authorization information (e.g. username and password)
- Principal – The people who will be using your API.
- Flow – This is where your API will be accessed from
For more security, you can use Authorization Parameters stored on a Principal (more on that later), but this is a simple example.
Steps to Implement HUD API in Salesforce
Step 1. Request your API key. For HMIS, you can do this here https://www.huduser.gov/portal/dataset/fmr-api.html. You will only be shown your API key once so you will need to write it down.
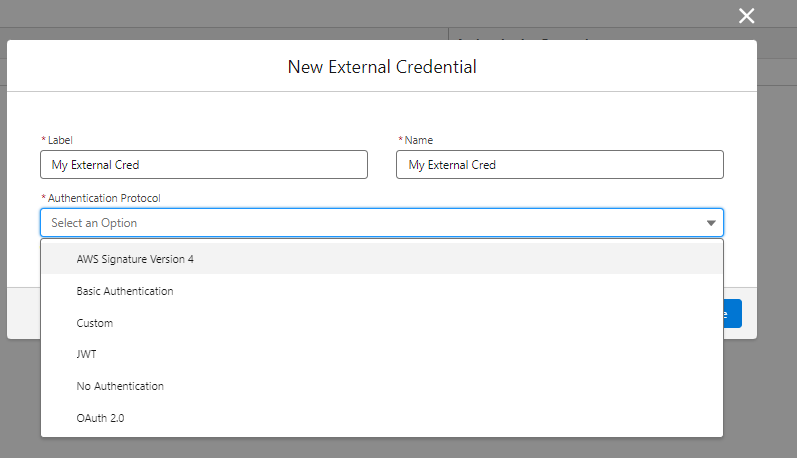
Step 2. Create your external credential. You will do this at Setup → Security → Named Credentials (despite the name.) Click the External Credential tab, and then click New. Give your External Credential a name (ideally one that has External in it so you don’t confuse it with your Named Credential.)
For Authentication Protocol, choose Custom. In other API situations you’ll choose Basic (if you only have a username and password and they haven’t told you to use a different.) We’re using Custom because we are passing in a Custom Header with our API key. Click Save.
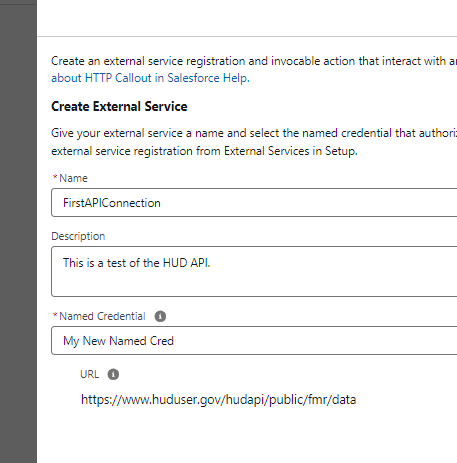
Step 3. Return to Setup → Security → Named Credentials and click the Named Credentials tab. Click New. For URL, you’ll pass in the URL of the API you are working with. In our case, https://www.huduser.gov/hudapi/public/fmr/data because that’s what was in our API documentation. Note the lack of a final slash. (it’s /data not data/). You will add the final slash in later. If you put it in now, you will get errors.

Ensure “Enabled for Callouts” is toggled on, and select the External Credential you just created
Under Callout Options, ensure “Generate Authorization Header” is checked. This will almost never need to be unchecked. Click Save.
Step 4. From the Named Credential you just created, locate the “Custom Headers.” section. The API documentation mentions we need to pass in the API key via a Custom Header:

Let’s add one. Click New.
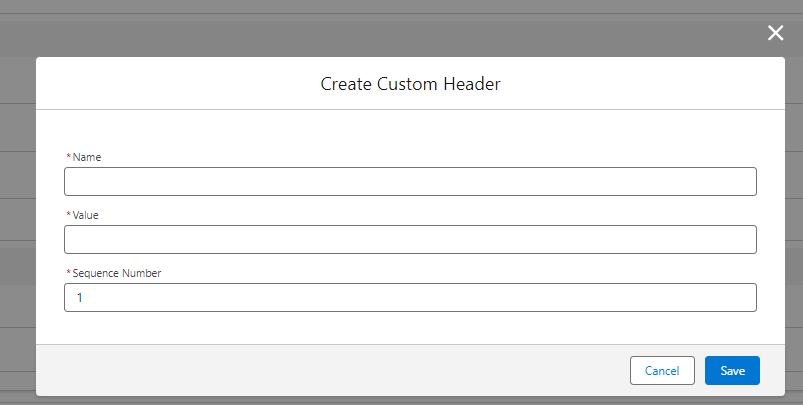
Whatever you put in “Name” will appear before the colon in the header. Whatever you put in Value appears afterwards. So because our Custom Header needs to look like this:
Authorization: Bearer YOUR_API_KEY” https://www.huduser.gov/hudapi/public/fmr/data/0801499999
Put Authorization as the Name and the words Bearer and your API key as the Value:
Remember that I’m using my own API key in the above example but you’ll need to use the one you requested from HUD in Step 1, so it will be different.
Don’t worry about the sequence number as we aren’t passing in multiple headers. Click Save. Do not add Custom Headers in both the Named Credential and External Credential or neither will work!
Step 5. Now you have a Named Credential which sets out your API, and an External Credential which authorizes the API, but nobody can access the API. Click the link to your External Credential to return to it. Locate the Principals section and click New.
Give this a human readable name like “Marketing Team”: Click Save.
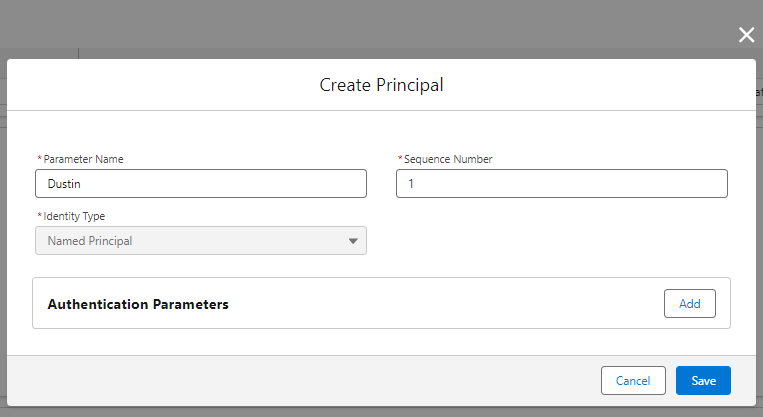
You could add Authentication Parameters here if you wanted to, but we don’t need to because we already stored our API key in the External Credential. (Salesforce provides some documentation for storing credentials with Principals but it’s a more advanced topic.)
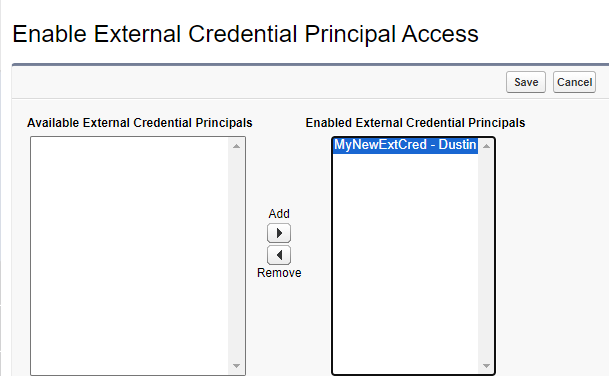
Step 6. From a Permission Set or Profile, you need to locate the section Enabled External Credential Principal Access and click Edit. Move your new Principal – External Credential combo from Available to Enabled and click Save. This authorizes this profile to use this External Credential.
Step 7. Now you have a Named Credential, External Credential, Principal, and they’re all authorized. Time to create a Flow. Go to Setup -> Flow and create a new Screen Flow.
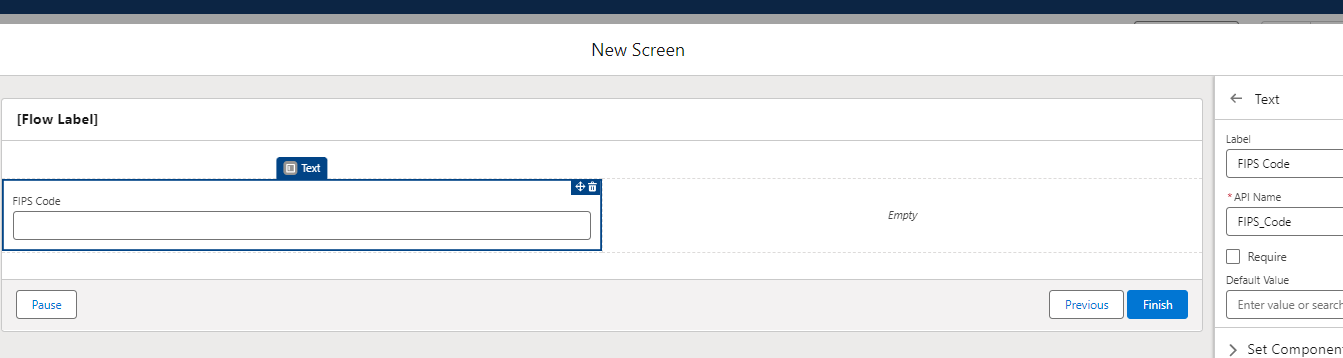
Add a Screen. Most APIs needs to take in at least one value in order to work. In our case, the HUD API takes in FIPS codes and returns information about them. Add a text field (this is important! It must be a string and not an integer.)
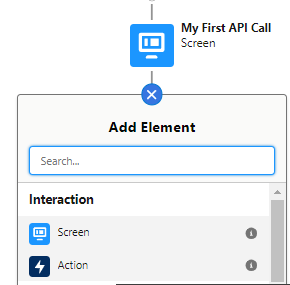
Step 8. Click Add Element, then Action.
Step 9. Instead of searching the Action list, locate the “Create HTTP Callout” button at the bottom and click it.
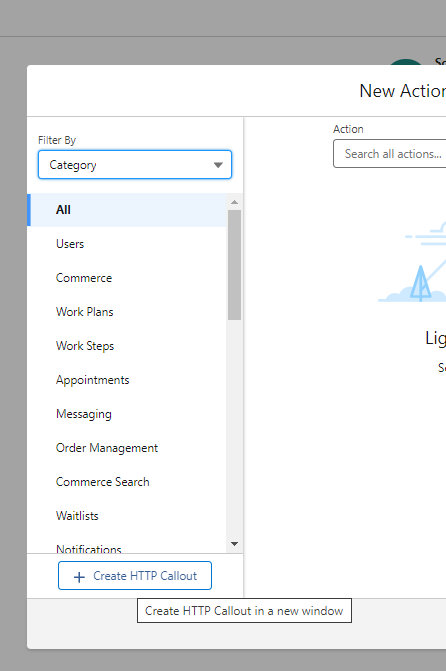
Give your External Service a name. This will be available for review in Setup → Integrations → External Services.
Click Next.
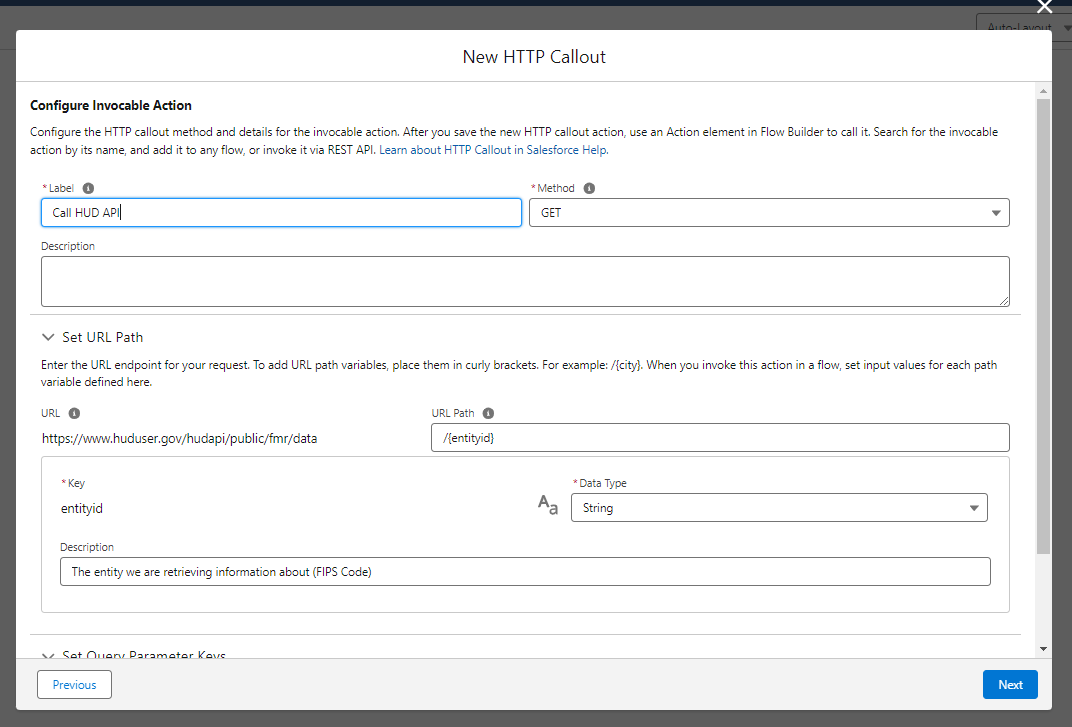
Step 10. Now you need to configure the Invocable Action. This is what will be visible within your Flow in Salesforce.
For Label, you can give it something like “Call HUD API.” For Method you will use GET. Other APIs may use POST to send information but we are only working with pulling information from the API in this example.
For the URL path, you’ll see the URL you defined earlier in your Named Credential. Our API documentation says the full URL should look like this:
In order to add the /entityid (which in this case is our FIPS code), we need to enter /{entityid} in our URL path. (Remember when I said don’t add the final slash in your endpoint URL back during the Named Credential? This is why.)
You’re then prompted to define what entityID is. Note that you can call this whatever you’d like. For example, {city} or {fips}. The important thing is that when the API is run, this curly braces variable will be replaced with whatever information you actually want to send.
We want to send the FIPS code. Although it’s a number, we’ll set the Data Type to String so that Salesforce treats it as text and doesn’t try to add commas or mess with the numbers. Click Next.
Step 11. Now we’re presented with two options: either to connect to the API now, and have Salesforce use the response to determine what data is coming back, or to submit sample JSON and have the system do it. I strongly recommend the first option, because if your connection isn’t set up, you’ll learn about it now. Plus if the API has changed from when you wrote down the JSON, you’ll get the most up-to-date information back.
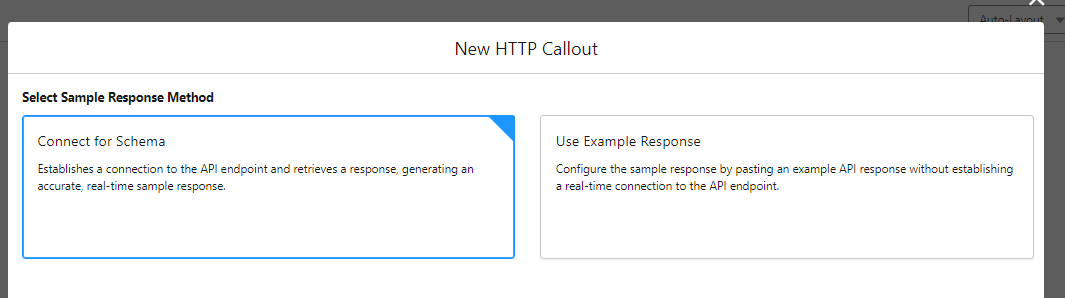
Select “Connect for Schema” and click Next.
Step 12. Now you’ll be prompted to fill in a value for the parameter {entityid} you defined earlier. This is so that the system can test your authentication and all the setup and confirm you’ve done it right. In my case, I submitted FIPS Code 0801499999 which is given on the HUD website.
Note: It’s extremely important that your value match exactly, including the 0 or you will get “Missing or invalid value in the query parameter(s).”
Fill your value in and click Connect:
If you’ve done this correctly, you’ll get an API response back:

Your API is configured. Click Save!
Step 13. Now you’re back at your Invocable Action, and Salesforce is asking for the source of the entity code we defined earlier:
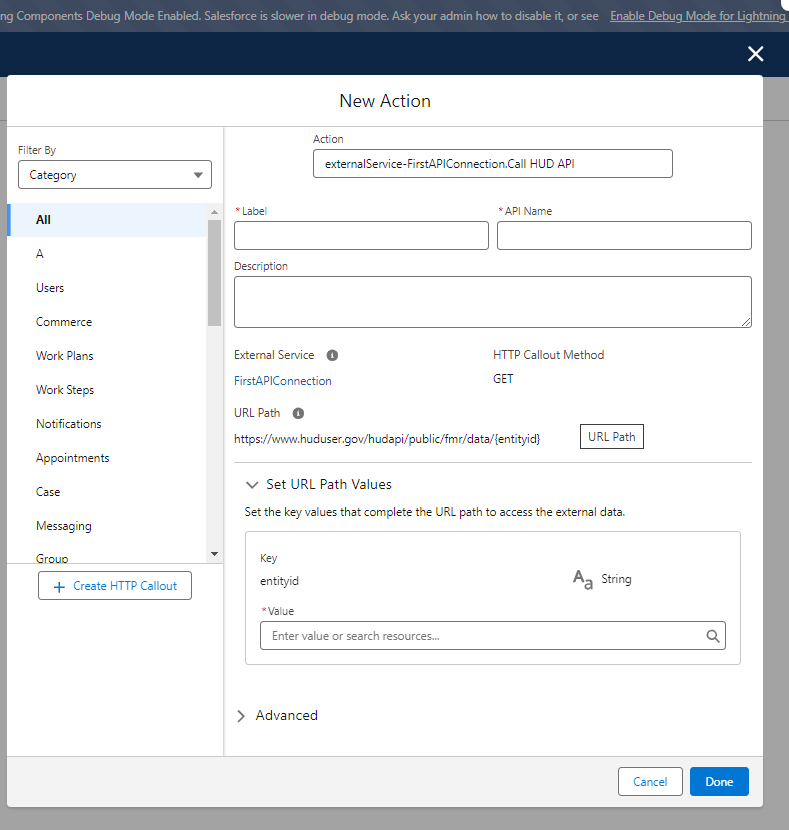
In our case, we’ll set it to the text box we created in Step 7.
Give your Invocable Action a name (this will be the name you’ll see in the Flow), and click Done.
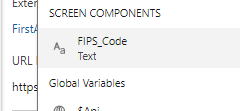
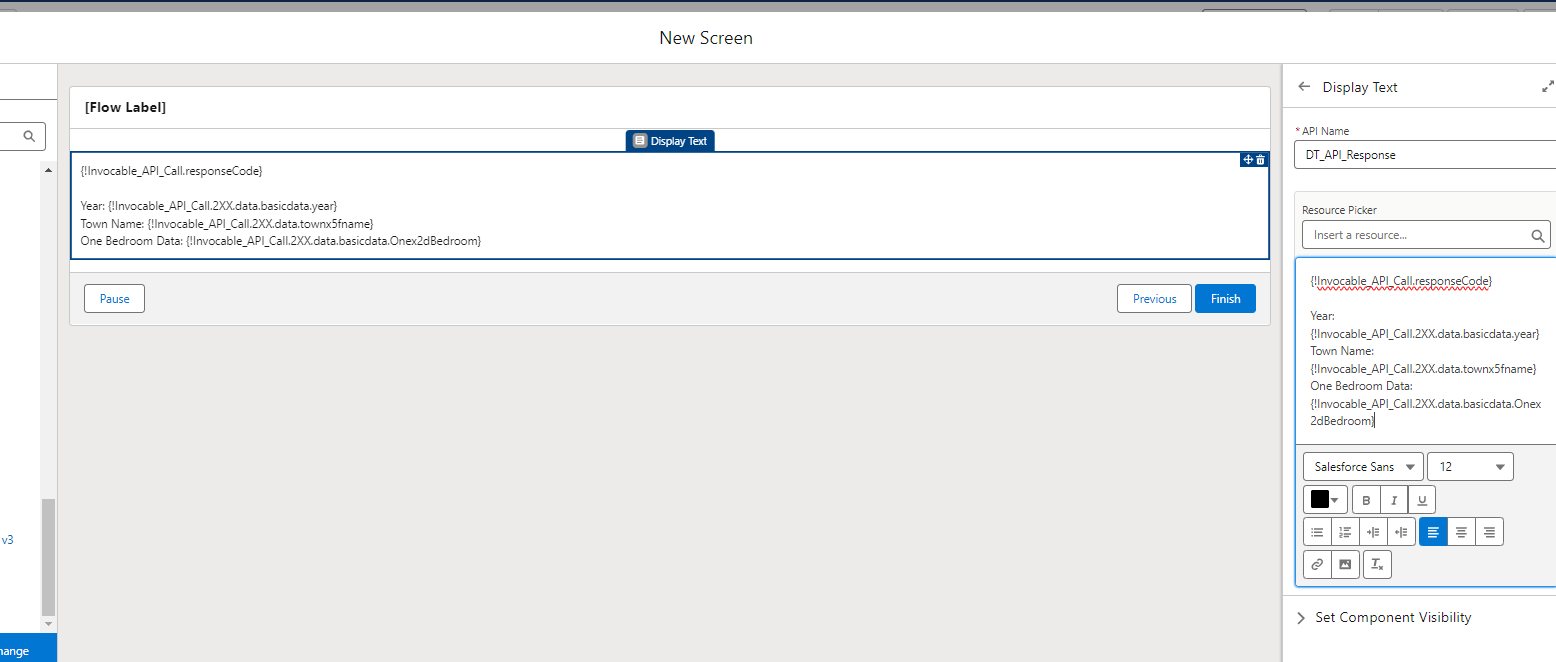
Step 14. When your API runs, the data will be stored in a variable. Your last step is to create another screen and put some of it on there. Here’s what it looks like on the new screen, when I go to select a variable.

Here’s what my Screen looked like after I put some fields on there:
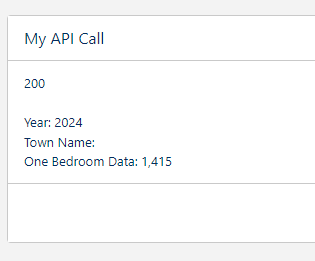
The Response Code is “200” when the API handled your query correctly, and another number like 401 or 403 (Authentication Failure), 404 (File Not Found) or 500 (Internal Server Error) depending on what happened.
Step 15. Last step, test! Save your Screen Flow. Click Debug and Run. In your first screen you’ll be asked for the FIPS code:
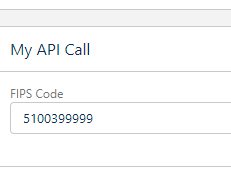
Click Next, and you’ll see the information pulled from the API. You’re done!
Deleting External Credentials
If you ever need to delete your External Credentials, you’ll need to delete the External Service Registration first (in Integrations -> External Services), then delete your Named Credential, and then finally your External Credential.
Conclusion
This was a marathon. I probably spent 8 hours across my two attempts trying to figure this out, but glad I didn’t give up and was able to figure it out, especially because when I Googled, I found people dealing with this same HUD API and not being able to figure it out. I hope those of you who Google in the future will find your way to this page!
Do you know of any interesting APIs? Did you struggle with HTTP Callouts or find this tutorial easy to follow? Let me know!